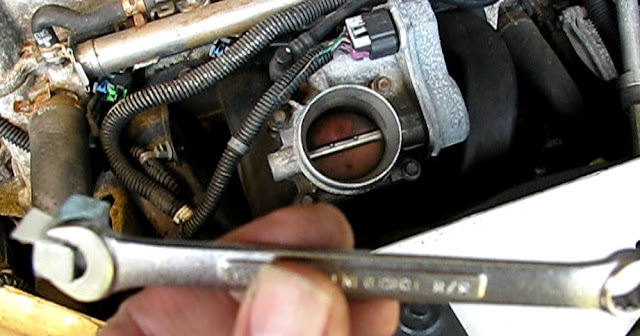
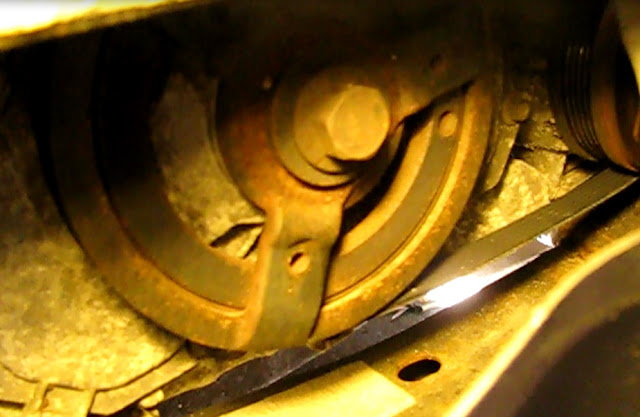
The serpentine belt on the GM 2.2L Ecotec engine can be a challenge to replace due to limited space and difficulties in getting a tool on the tensioner. In this post I will replace the belt without a special tensioner wrench. Such a tool,though, will likely greatly aid in changing the belt on this particular engine. Some additional GM models that are fitted with this engine include HHR, Malibu, Alero, Grand Am, Sunfire, Saturn L series as well as some Opel and Vauxhall cars. This job was done on a 2006 Chevrolet Cobalt. This car is equipped with an air conditioner.
The job at a glance
- Tools: A serpentine wrench with a 3/8" square male end, 10mm socket or wrench, Philips screwdriver, Optional: 3/8" square keystock 2mm long, 3/8" open end wrench, 10" crescent wrench and a piece of pipe big enough to fit over the wrench and at least two feet long. Also optional but recommended: lug wrench and tire jack.
- Materials: none
- Parts: Serpentine belt (Gates K050400) see link at end of post.
- Cost of parts: Belt $15-20
- Time: 30 minutes
This procedure assumes a one person job. If there is the luxury of a helper, some of the steps do not apply.
1) Disconnect the battery (in the trunk) with a 10mm socket or wrench.
2) Optional but will greatly aid in this job: Break lug nuts on right front wheel, jack the wheel up and remove. Remove a couple of panel fasteners and pull down on the wheel well cover to reveal the crankshaft pulley.
3) Remove the air intake assembly from the air filter cover to the throttle body, Unsnap from the air filter and loosen a clamp screw attaching the other end to the throttle body.
4) Locate the 3/8" square hole for the serpentine tension release tool. It is about midway between the front and back of the tensioner.
 |
| The belt path is simple. The job less so. |
 |
| The 3/8" key stock displays the relative position of the tensioner hole |
5) Place your tool in the hole and lift upward to release tension. If doing the job by yourself, a means to hold the tension off is very helpful. This is how I did it, although I'm sure there are better ways. I used a 2mm piece of key stock and jammed it into a 3/8" open end wrench with a piece of thin plastic. This held the key stock in place while I probed around for the square hole. When I fit it in there, I pulled the wrench off.
 |
| That's a bit of plastic from a milk carton jammed between the key stock and the wrench |
Next I placed a 10" crescent wrench on the keystock. I pulled the wrench upward to release tension and slipped a two foot long piece of pipe over the wrench and jammed it against the engine cradle frame.
 |
| The 10" crescent wrench is on the key stock |
Lastly, I slipped a wood wedge in between the pipe and the frame to reach full travel on the tensioner. With a special tensioner wrench just find the hole and pull up on the long handle. I would hope there would be enough radius to fully relieve tension. I haven't tried this on this engine.
 |
| Makeshift tools are in place and tension is fully off the belt |
6) Remove the belt. Leave the tension release tool(s) on and slip the belt out between the alternator and ac compressor. Pull the belt off the air conditioning compressor first, then the alternator and finally the crankshaft pulley. The crankshaft is easier with the wheel and lower wheel well cover out of the way. A couple of panel fasteners have to come off to get the cover out of the way.
 |
| Getting the belt off and on the crankshaft pulley is so much easier with the wheel and cover removed |
Installation
1) Slip the new belt over the crankshaft pulley and under the tensioner. Then place it over the alternator. Finally, slip it over the ac compressor. Double check to make sure the belt is perfectly seated on all components
2) Remove the tension holding tools. Check the belt for placement one more time.
3) If removed, reinstall the wheel well cover and wheel, set the wheel down and torque.
4) Re-install the upper air intake assembly. This may be easier if the a hose is separated.
5) Re-connect the battery.
Source: http://www.originalmechanic.com/2015/10/how-to-replace-serpentine-belt-on-gm.html
Posted by: delmardelmarsproulee0270885.blogspot.com


0 Comments